 Fairhaven Siding
 Building New in Sudden Valley Means Getting Windows Right the First Time
New construction gives you one real chance to do windows correctly before the walls close up and the siding goes on. Once a house is dried in and finished, fixing a bad flashing detail means tearing into work that's already done. That's why the window install during framing matters more than almost any other step in the building process — it sets whether the house stays dry for the next thirty years or starts showing rot and stains within five.
Sudden Valley presents its own version of this challenge. It's a heavily wooded, lake-adjacent community, and homes built there sit under tall conifer canopy that keeps siding, trim, and window surrounds shaded and slow to dry for much of the year. Add in the driving rain and long moss season that define this part of Whatcom County, and a new-construction window package needs to be planned for the site it's actually going into, not installed the same way you'd do it on an open lot in town.
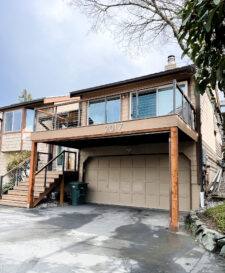
The Climate Sudden Valley Windows Have to Handle
Whatcom County's marine climate means near-constant moisture exposure for a good part of the year — wind-driven rain that gets pushed sideways into wall assemblies, humidity that lingers under tree cover, and a moss and algae season that can run six months or longer on any surface that doesn't get regular sun and airflow. Homes closer to Bellingham Bay and the Fairhaven waterfront also deal with salt-laden air, which is part of why we spec corrosion-resistant fasteners, flashing, and hardware as a standard practice across the region rather than only on homes right at the shoreline.
In Sudden Valley specifically, the bigger factor is usually shade and slow-drying wall surfaces rather than direct salt spray. Lake Whatcom sits nearby, tree cover is dense on most lots, and a lot of homes have at least one elevation that rarely sees direct sun. That combination is exactly what accelerates moss growth and keeps window sills and trim damp longer after a storm — which is why sealing details and drainage paths matter more here than they would on a wide-open, sun-exposed lot.
What This Means for a New Build
- Window openings need a reliable drainage path so any water that gets past the exterior cladding has somewhere to go besides the framing.
- Flashing materials and fasteners should be rated for long-term moisture exposure, not just code minimums.
- Frame materials and finishes should hold up to sustained humidity and shade without early failure or finish breakdown.
- Sill and trim details should account for slower drying time between rain events.
What a Correct New-Construction Window Install Actually Involves
New-construction windows are installed differently than a retrofit replacement, and the sequence matters. A rushed or out-of-order install is one of the most common causes of hidden water damage in newer homes — the window itself is rarely the problem, the flashing sequence around it is.
A correct install, in order, generally includes:
- Sill pan flashing at the bottom of the rough opening, sloped to drain any water to the exterior rather than letting it sit against the sill or wick into the framing.
- Weather-resistive barrier (WRB) integration so the house wrap laps correctly over the flashing at the sides and bottom, and is later lapped by the head flashing — water always has to move downward and outward, never behind the next layer.
- Window installation — nail-fin or block-frame depending on the wall assembly — set plumb, level, and square, with the fin or flange fastened per the manufacturer's pattern.
- Side and head flashing lapped in shingle fashion over the WRB, with a head flashing or drip cap directing water away from the top of the window.
- Kick-out flashing at any point where a roofline meets a wall above a window, to stop roof runoff from being funneled straight down into the window assembly.
- Low-expansion foam or backer rod and sealant around the interior perimeter for air sealing, without over-filling the gap in a way that bows the frame.
- Exterior sealant at the specific joints the manufacturer calls for — and only those joints. Sealing the wrong joint can trap water instead of releasing it.
Every one of those steps is inspectable at the time it's done and essentially invisible once siding goes on. That's the entire argument for hiring a crew that treats this stage as seriously as the finish work everyone actually sees.
Choosing Frame Material for a Wooded, Wet Lot
Frame material is one of the few decisions a homeowner makes directly, and it matters more in a shaded, humid setting like Sudden Valley than it would on a drier lot. There's no single right answer for every home — it depends on budget, the home's style, and how much upkeep the owner wants to take on.
| Frame Material | Moisture Resistance | Maintenance | Typical Cost Position |
|---|---|---|---|
| Vinyl | Very good — won't rot, resists moss and mildew staining | Low — occasional cleaning | Most affordable |
| Fiberglass | Excellent — dimensionally stable in swings of humidity and temperature | Low | Mid to upper range |
| Wood-clad | Good on the exterior clad face, but interior wood and joints need attention | Higher — finish and joint upkeep over time | Highest |
| Aluminum | Doesn't rot, but prone to condensation and cold transfer without thermal breaks | Low | Mid range |
For most new builds in Sudden Valley, we steer homeowners toward vinyl or fiberglass for standard elevations, and reserve wood-clad for street-facing or architecturally prominent windows where the owner wants that look and is willing to keep up with it. We'll walk through the trade-offs honestly rather than push whatever has the best margin — the goal is a window package that still performs well a decade in, not just on move-in day.
Energy Code and Performance in a Marine Climate
Washington's energy code sets minimum performance requirements for new-construction windows, and western Washington falls under the state's marine climate zone provisions. In practice, that means most window packages sold for new construction here already meet or beat those minimums — U-factors in the low-to-mid 0.30s or better are typical for a standard double-pane, low-E package, with better performance available for homeowners who want it.
What we focus on beyond the code minimum is orientation. A north-facing window under tree cover has very different solar gain needs than a south- or west-facing window with more direct exposure, even on the same lot. We help builders and homeowners match glass packages to each elevation rather than spec one glass type for the whole house, which is a common shortcut that leaves some rooms colder and others overheating in the few weeks of real summer sun this area gets.
Coordinating With Your Builder's Timeline
Window installation happens at a specific, narrow window in the build schedule — after the WRB is on and the rough openings are framed, before siding or exterior finishes go up. Missing that window, or having the wrong crew rush through it to keep a builder's schedule moving, is how corners get cut.
We work directly with general contractors and framing crews on timing, and we don't skip the flashing sequence to hit a deadline. If the site isn't ready — WRB not yet installed, openings out of square, or flashing materials not yet on site — we'll say so rather than install anyway and hope it works out. On a build in a setting like Sudden Valley, where slow drying makes any mistake linger longer, that discipline matters more than it would on a drier, more open lot.
Sudden Valley Specifics: Access, Site Conditions, and Design Review
Sudden Valley is a private, gated community, and many new builds there go through an HOA design review process that covers exterior materials and appearance, including window style and trim. We're familiar with working inside that kind of process and can coordinate submittal timing with your builder or architect so window selection doesn't become a bottleneck.
Site access and staging are also worth planning ahead of time. Wooded lots with limited driveway or turnaround space are common in Sudden Valley, and material staging and equipment access need to be worked out with the builder before delivery day, not on it.
Our Process, Start to Finish
- Plan review: we look at window schedules, elevations, and rough opening sizes before anything ships, to catch mismatches early.
- Product consultation: we walk through frame material, glass package, and finish options elevation by elevation, based on sun exposure and tree cover.
- Coordination with your builder: we confirm dry-in timing and get on the schedule at the right stage — not before the WRB is on, not after siding starts.
- Installation: sill pan, WRB integration, window set, flashing sequence, and sealant, done in the correct order and to manufacturer spec.
- Walkthrough: we review the finished install with the builder or homeowner before the openings get covered by siding, so everyone can see the flashing work directly.
A Practical Checklist Before Windows Go In
Whether you're the homeowner, the builder, or managing the project yourself, these are worth confirming before installation day:
- Rough openings are framed square and to the correct dimensions for the ordered windows.
- The WRB is installed and properly lapped at all rough openings.
- Sill pan flashing material and head flashing are on site and match the wall assembly.
- Frame material and glass package are confirmed per elevation, not just per house.
- Fasteners and flashing hardware are corrosion-resistant, appropriate for a marine climate.
- Kick-out flashing is planned for any roof-to-wall intersections above window openings.
- HOA or design review approvals are in hand if required for your lot.
- A walkthrough is scheduled before siding closes up the flashing work.
If you're building new in Sudden Valley and want a straight answer on window selection, timing, or what your current plans call for, we're happy to take a look and put together a free, no-pressure estimate — just fill out the form below.