 Fairhaven Siding
 Roofing on an Island Changes the Job
Lummi Island sits out in the Salish Sea, and that changes what a roof has to deal with compared to a house a few miles inland in Bellingham or Fairhaven proper. Homes on the island get more direct exposure to wind off the water, more salt-laden air, and in the shadier, tree-covered lots, a moss problem that never really goes away. A new roof installation here has to account for all of that from the design stage, not just at the finish nailing.
We're based in Fairhaven and work Whatcom County regularly, including the ferry crossing to Lummi Island. That matters more than it sounds like it should — island jobs run on a different clock, and a crew that's done the logistics before doesn't waste your money figuring it out for the first time on your roof.
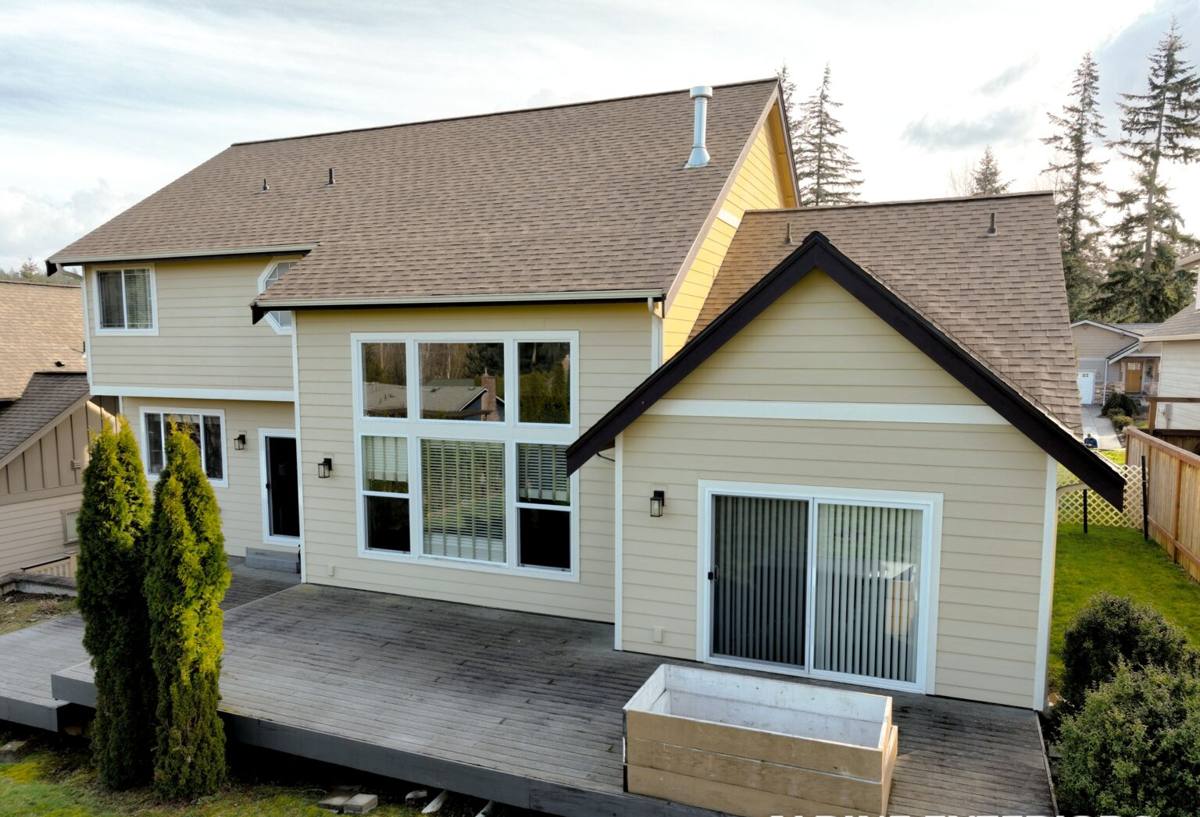
Why Lummi Island Roofs Wear Differently
Salt Air and Metal Components
Airborne salt accelerates corrosion on anything metal — fasteners, flashing, drip edge, vent caps, and any exposed roofing hardware. On a standard inland roof, cheaper galvanized fasteners might hold up fine for decades. On an island roof exposed to salt spray and driving rain, the same fasteners can start showing rust streaks and weakening well ahead of schedule. We spec corrosion-resistant fastener and flashing materials for island work as a standard practice, not an upsell.
Moss From Shade and Moisture
Lummi Island has plenty of tree-covered, shaded lots, and combined with the region's wet fall-through-spring stretch, that's exactly the environment moss thrives in. Moss holds moisture against the roof surface, works its way under shingle tabs, and over years can lift edges and create paths for water intrusion. A roof installed without moss-resistant details or proper airflow underneath will grow moss faster than one designed with this climate in mind.
Driving Rain and Wind-Driven Water
Storms off the water tend to push rain sideways, not straight down. That means flashing details at valleys, chimneys, skylights, and wall intersections have to be tighter than what you'd get away with on a more sheltered inland roof. Most roof leaks we find on older island homes trace back to flashing and underlayment shortcuts, not the shingles themselves.
What a Correct New Roof Installation Involves
A new roof is more than laying shingles over what's there. Done right, it includes:
Tear-Off and Deck Inspection
We remove the old roofing down to the deck and inspect for soft spots, rot, or delamination — especially around valleys, penetrations, and eave edges where moisture tends to collect over the years. Any damaged decking gets replaced before anything new goes down. Skipping this step is the single most common way a "new roof" fails early.
Underlayment and Ice-and-Water Barrier
In a climate with this much sustained wet weather, underlayment choice matters. We use self-adhered ice-and-water barrier at eaves, valleys, and around penetrations, with synthetic underlayment across the rest of the deck. This gives the roof a real second line of defense if wind-driven rain or an ice dam gets past the surface layer.
Ventilation for Moisture and Moss Control
Proper intake and exhaust ventilation keeps the underside of the roof deck dry and helps the surface dry out faster after rain — which matters directly for moss growth and shingle life. A roof that can't breathe stays damp longer, and damp roofs grow moss and age faster, full stop.
Flashing Detail Work
Chimneys, skylights, dormers, and wall-to-roof intersections get step flashing, counter-flashing, and sealant details built for wind-driven rain, not just a bead of caulk over the old metal. This is where most leaks start, so it's where we spend the most careful attention.
Material Choices for Lummi Island Homes
There's no single "best" roofing material for every home — it depends on your budget, your home's style, and how much maintenance you want to take on. Here's an honest comparison for this specific climate:
| Material | Salt Air / Moisture Performance | Moss Resistance | Maintenance | Relative Cost |
|---|---|---|---|---|
| Architectural asphalt shingle | Good with proper flashing and fasteners | Moderate — benefits from copper/zinc strips or granule treatment | Periodic moss/debris removal | $ |
| Standing seam metal | Very good with marine-grade coatings and fasteners | High — sheds moisture fast, little surface for moss to grip | Low — occasional inspection | $$$ |
| Cedar shake | Traditional look but needs diligent upkeep in wet climates | Low without regular treatment | High — regular cleaning and treatment required | $$$ |
We'll walk you through which option fits your home and your tolerance for upkeep — cedar shake can look great here, but we'll be straight with you that it demands more maintenance discipline in a moss-prone, wet climate than asphalt or metal.
The Logistics of an Island Roof Job
This is the part that's genuinely different from a mainland job, and it's where an unfamiliar crew can cause you delays or added cost. Roofing materials — bundles of shingles, rolls of underlayment, ridge caps, a dumpster or debris trailer — all have to make the ferry crossing along with the crew and equipment. That means:
- Material orders get staged and confirmed before the crossing, not adjusted on the fly once we're on the island
- Crew and equipment scheduling accounts for ferry timing so we're not burning daylight waiting on a sailing
- Debris and tear-off waste removal is planned as part of the job, not an afterthought once a dumpster is already full
- Weather windows are watched closely — a tear-off day gets picked around a stretch of dry weather so your home isn't exposed overnight
None of this is complicated once you've done it a few times. It just has to be planned for, and it's the kind of detail that turns into wasted trips and delays when it isn't.
Our Installation Process
Here's how a typical Lummi Island new roof project runs with us, start to finish:
- On-site inspection and estimate — we look at the existing roof, deck condition, ventilation, and any problem areas, and give you a written estimate with material options.
- Material selection — we go over the tradeoffs in the table above and land on what fits your home and budget.
- Scheduling — we plan the job around ferry sailings and a realistic dry-weather window, and confirm materials are staged ahead of the crossing.
- Tear-off and deck repair — old roofing comes off, the deck gets inspected, and any damaged sections are replaced before we move forward.
- Underlayment, flashing, and installation — ice-and-water barrier, synthetic underlayment, flashing, and the new roofing material go on in sequence, with the roof dried in the same day whenever conditions allow.
- Final inspection and cleanup — we walk the roof, check every flashing and penetration detail, and clear debris and fasteners from the property before we leave.
Why a Crew That Already Works Lummi Island Matters
A roofing crew that's never worked the island before is learning the ferry schedule, the weather patterns, and the moss and salt-air realities on your dime. We've done the logistics enough times that it's routine, which keeps your project on schedule and keeps surprise costs off your invoice. It also matters after the job is done — if a warranty question or a storm-related issue comes up, you're dealing with a Fairhaven-based crew that's a short, planned trip away, not a mainland contractor who has to figure out the crossing from scratch.
We also know Whatcom County permitting and inspection requirements, so that part of the process moves without back-and-forth delays.
Signs Your Roof Needs Replacement, Not Just Repair
Not every roof problem means a full replacement — but on an island home in this climate, some signs mean patching is just delaying a bigger bill. Watch for:
- Heavy moss coverage that keeps returning shortly after cleaning
- Shingles that are curling, cracking, or losing granules in patches
- Soft or spongy spots when walking the roof, indicating deck damage underneath
- Staining or moisture on interior ceilings, especially after wind-driven rain
- Flashing that's rusted, lifted, or separating from chimneys, skylights, or walls
- A roof that's nearing or past its material's expected service life
Maintaining Your New Roof in This Climate
A new roof installed correctly for this environment still benefits from basic upkeep. Keep gutters clear so water isn't backing up under the eaves, especially with the amount of tree debris common on shaded island lots. Have moss growth addressed early rather than letting it establish, since it's far easier to manage on a light coating than after it's worked under shingle edges. A periodic visual check after major storms — looking for lifted shingles, displaced flashing, or debris buildup in valleys — catches small issues before they become interior leaks.
If you're weighing a new roof for your Lummi Island home, we're happy to come out, take a real look, and give you a straightforward, no-pressure estimate — just fill out the form below.